Bal-tec™ Home How Balls Are Made
How Balls Are Made

The smallest diameter balls are made by spherically grinding cylindrical slugs that have been cut off a roll of wire. Balls over about 0.060 of an inch are formed into spherical shapes by cold heading machines. Some materials must be cast or molded into spherical shape. Still other hard, brittle materials, like ceramic, glass, and sapphire, are sliced and then diced into cubes with a diamond tipped saw. Even though the various raw materials start out in different forms, once they reach a generally spherical shape they follow the same processing to completion. They are rough and finish ground between two rotating plates. To economically produce small quantities of balls, we have modified standard ball grinding machines, equipping them with small diameter tools. The alignment of the machines has been refined and we have greatly reduced the operating pressure. In addition to these modifications, we have developed special machinery which allows us to grind and lap one single ball at a time. This is important when the amount of raw material is limited, or expensive, and for large balls where the blanks are costly.
Metallurgy
Metallurgy is the one basic discipline required to evaluate the physical properties of balls, both in process and as finished products. From the tensile strength of the raw material, to the crush strength of the finished ball, many metallurgical tests must be performed. Each material presents different problems to our metallurgy department: The prior grain size in some steel is very critical, alloy segregation is an important factor in most copper base alloys, the case depth and its hardness are important in surface treated metals.
Sphericity
Measuring the roundness of a ball is no problem using the Talyrond system. This system is our fastest accurate method of measuring roundness. The ball being inspected on the Talyrond remains at rest on the table while the test probe is rotated accurately around it. A permanent polar chart recording is produced. The overall accuracy of this machine is one millionth of an inch. The calibration is verified by standards traceable to the National Institute of Standards and Technology (NIST).
Inspection
Our dimensional measuring lab is world renowned. It is equipped with an outstanding array of sophisticated optical, mechanical and electro-mechanical measuring machines. In addition to maintaining the quality of our own products, our lab is for hire. We engage in research and development, product evaluation, and failure analysis that is related to dimensional metrology.
Ball Siszing Kits
Ball sizing is the process of forcing an oversize ball through the inside diameter of a metal part. It will increase the diameter a controlled amount and greatly improve the surface texture. We manufacture a complete line of fractional inch ball sizing kits. The kits include rods to push the ball through, and extreme pressure lubricant to improve surface texture and extend the useful life of the ball. Ask for literature.
Inspection Ball Kits
We manufacture metrology ball kits in Fractional Inch, 1/32" through 1", Decimal Inch, .100" through 1", and Metric Diameters, 1mm through 24mm. These ball kits are used primarily for inspection. By using two different diameter balls, internal tapered diameters can be measured. Balls are excellent for measuring dove-tails and pitch diameter of threads or gears. For tube bending, there is no better way to check the finished product for minimum diameter than with ball.
Surface Finish
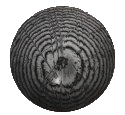
The surface texture or micro finish of a ball is easily evaluated using the C.E.J. Multimi. This instrument is a multibeam microinterferometer. Vertical magnification of 500,000 times is just ordinary for the Multimi, which has an ultimate resolution of .02 millionths of an inch. Photographic documentation may be provided in the form of a microinterferogram. The calibration of this instrument is based on a natural standard, the green light band of mercury, 5461 Angstrom.
