Bal-tec™ Home Kinematic Encyclopedia
The Kinematic Encyclopedia
The Accuracy of Kinematic Couplings
The first task in discussing the accuracy of a kinematic coupling is to define what we are talking about. The normal task of a kinematic coupling is to provide strain free, highly repeatable positioning of a payload in relation to the fixed position in a mechanical system. Note that in this statement, there has been no reference to the true X-Y and Z position of the payload in three dimensional space. Just using the most ordinary quality kinematic hardware will produce repeatability between the two kinematic platforms in the micrometer (40 micro inch) range. By using super stiff cermet component parts with the geometry and surface texture held to the highest possible quality, repeatability in the nanometer range can be achieved.
To reach true X-Y and Z positioning of the payload of a kinematic coupling and to have this position repeat time after time, all of the component parts of the kinematic system and their exact location in three dimensional space must be very precisely machined. This may not sound like a very daunting task, but actually it is. Each mechanical body has 6 degrees of freedom that must be constrained. Each one of the 6 constraints has 2 points of physical contact involved in positioning it. There is the point of contact that constrains and there is the point on the body that is constrained. This gives us 12 points that must each be accurately positioned in the X-Y-Z positions of three dimensional space. Machining the 36 positions of these 12 points of contact to a high degree of accuracy is no small job.
Around the Corner
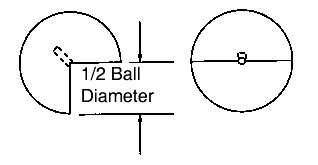
Around the corner is made up of spherical, component parts, used in special kinematic applications. The simplest form of an Around the Corner couple would be two balls mounted side by side. If a male cylinder or male vee were placed in the notch between the two spheres, you would find perfect constraint of two degrees of freedom over an enormous field of movement.
Three such couples would provide a complete kinematic coupling of the very highest quality. In practice complete spheres are seldom used for this couple. Spherical sections with flat mounting surfaces and clearance holes or internal threads are the norm. These small spherical bites, are the devices that are normally used in Keystone kinematic couplings (See: “Keystone Kinematic Couplings”).
The Aspect Ratio
When the length of the kinematic payload is longer than its width, we end up with an aspect ratio that is not one to one. This means that the configuration of the kinematic coupling can no longer be a nice balanced equilateral triangle. When the aspect ratio exceeds three to one, special measures must be used to achieve good repeatability and freedom from the distortion (strains) that are due to the stresses, imparted by the load. To successfully support payloads with a large aspect ratio, we must use the most powerful kinematic couples possible and the pattern of the couplings should be separated, with one at each end and one in the center.
Start out by positioning a trihedral like couple of one design or the other off center (on one edge) at one end. A three ball kinematic couple is good for light loads. The Rose Bud is excellent and will support a much heavier load. The true trihedral prism with three flat surfaces that are of excellent quality will support the heaviest load, however it is the most expensive design. Next you place a Vee Block of one kind or another at the other end, on the same edge as the trihedral. Caution; the longitudinal axis of the Vee Block should be parallel to the long axis of the coupling not at some angle or another. This design creates a kinematic hinge of excellent adaptability. Two parallel, rigidly mounted cylinders form an excellent Vee Block for light loads. Two quarter rounds are excellent and will support a much heavier load. A prismatic Vee Block with high quality flat surfaces will give excellent stress free location and will support the heaviest load. It is not economical to precision lap the flat prismatic surfaces of monolithical vee blocks, so they are somewhat less accurate than the rival cylinders.
A high quality flat and sphere couple is placed in the center of the coupling as far off the center line of the other two couples as possible. Using this design practice, kinematic couplings with aspect ratios of thirty to one have been built, that will repeat with in a few micro inches (less than 100 nanometers). [Large aspect ratios foster “loosy” conditions] (See: loosy in this Encyclopedia and See: technical paper in www.precisionballs.com/loosy_kinematic_couplings.php). (See “Rose Bud”) (See “Quarter Round”) (See “Trihedral”) (See “Vee Block”) (See “Ball”).
Ball
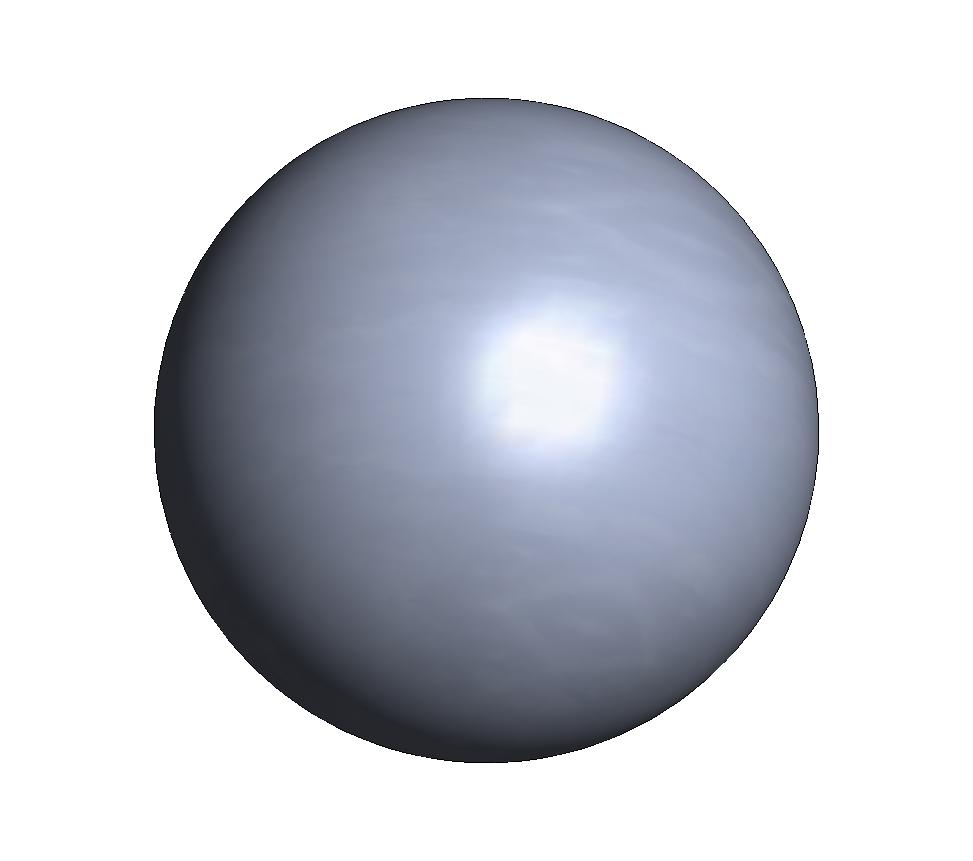
A ball is one of the fundamental elements in almost all kinematic couplings. A perfect ball is defined as a geometric figure with its entire surface area equidistant from a single point in three dimensional space. A ball or sphere is a basic geometry that can be described by a simple mathematical equation. The geometric and surface quality of the balls used in a kinematic coupling is one of the limiting factors in the couplings performance. Only a very stiff, very round ball with a very fine surface finish and very low value of waviness should be used in kinematic applications.
A complete ball can be economically installed in a kinematic platform by first machining a pocket that is nearly hemispherical. A female cone can be used, but it is much less effective. This pocket is wetted with a high strength epoxy glue, and the ball is clamped in place with enough force to squeeze out the excess glue. Wipe the excess epoxy glue away with some absorbent material wetted with Isopropyl Alcohol. Very precision balls are commercially available in a variety of materials for kinematic coupling applications. (See “Sphericity of a Ball”).
Ball, Threaded
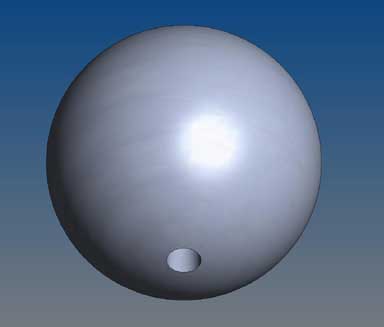
A threaded Ball is one of the simpler and therefore less expensive methods of holding a complete ball in place for kinematic applications. The threaded ball can be held in a conical recess, or ideally it is epoxy glued and screwed into a matching spherical recess. When gluing a threaded ball into a spherical recess, the epoxy glue is first applied to the recess and pressure is applied to squeeze out the excess glue. Wipe the excess epoxy glue away with some absorbent material wetted with Isopropyl Alcohol. A hardened stainless steel or tungsten carbide ball can be economically threaded by electrical discharge machining E.D.M. (See “Ball” for a technical description of spherical geometry.) (See “Hard Stainless Steel”)(See “Tungsten Carbide”) (See “Sphericity of a ball”) (See “Electrical Discharge Machining”).
Ball, Truncated
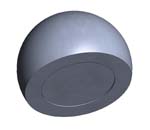
A truncated ball, is simply a ball with flat ground on it. This is one of the least expensive ways of mounting the balls for a kinematic coupling. Truncated balls are usually recessed in the center to provide a shallow reservoir for a better glue line. It is easy to glue these truncated balls, on to a flat surface, with a high strength epoxy glue. A much more reliable method is to glue the truncated ball into a shallow, close fitting, counter bore. This technique provides the truncated balls with a much higher shear strength.
Truncated balls are commercially available in both Hard Stainless Steel and Tungsten Carbide Wipe the excess epoxy glue away, with some absorbent material wetted with Isopropyl Alcohol. (See: “Ball” for a technical description of spherical geometry). (See “Ball” for a technical description of spherical geometry.) (See “Hard Stainless Steel”)(See “Tungsten Carbide”) (See “Sphericity of a ball”) (See “Electrical Discharge Machining”).
Ball, Truncated and Threaded
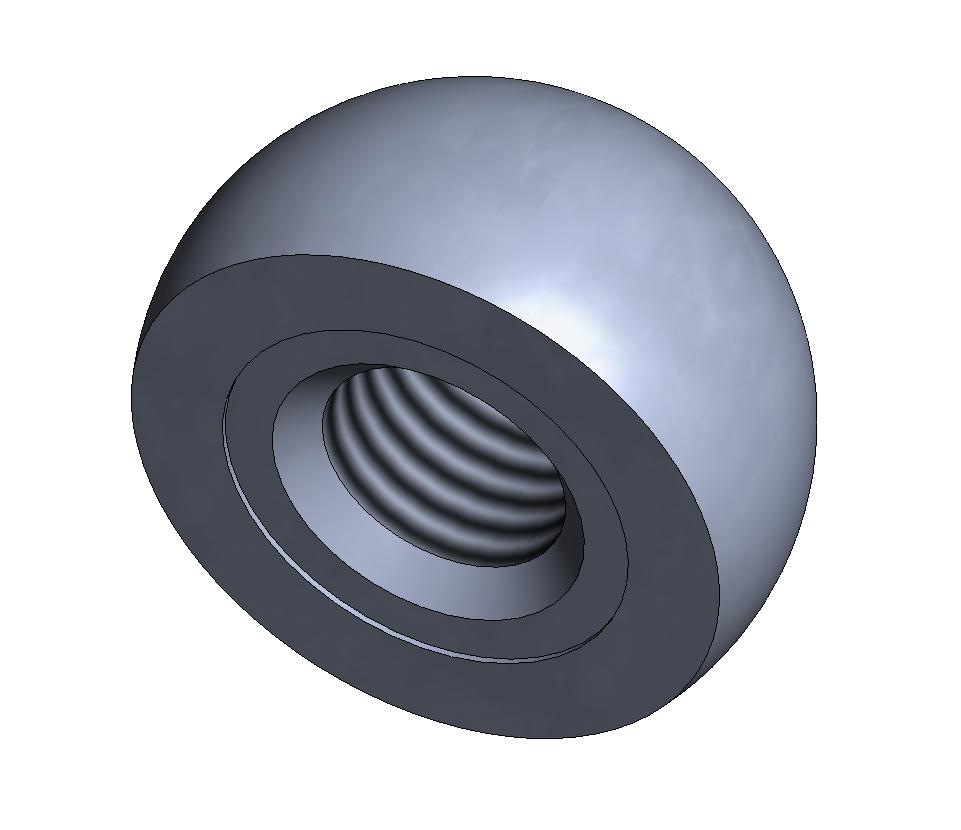
A truncated and threaded ball (T.B.R.T.) is the most popular methods for holding a ball in place for kinematic applications. The truncated and threaded ball is usually recessed in the center to provide a shallow reservoir for a better glue line. To improve the permanence of the location of the T.B.R.T. it is often glued down with a very high strength epoxy glue. Wipe the excess epoxy glue away, with some absorbent material wetted with Isopropyl Alcohol.
A hardened stainless steel or tungsten carbide ball can be surface ground to produce a flat and then threaded by using the Electrical Discharge Machining E.D.M. method. This mounting method is rugged, accurate and economical. The truncated and threaded ball is usually mounted by pulling it down against the flat surface of the kinematic platform with a threaded fastener from the back of the platform. To rigidly install a truncated ball onto a threaded stud from the front, a Lotus Wrench may be used. This device will install the ball without any damage. A wide variety of sizes of both hard stainless steel and tungsten carbide balls, that are truncated and threaded are commercially available. (See “Ball” for a technical description of spherical geometry.) (See “Hard Stainless Steel”)(See “Tungsten Carbide”) (See “Sphericity of a ball”) (See “Electrical Discharge Machining”).
Ball with a Blind Hole
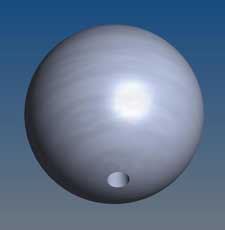
A complete ball with a hole in it provides a very inexpensive method to better secure the ball to the kinematic platform. For the best results, machine a spherical pocket to match the ball diameter. A female cone can be used, but it is much less effective. Add a concentric pilot hole in the center of the pocket. Apply a high strength epoxy glue to a pin and insert it into the hole in the center ball.
Apply epoxy glue to the surface of the spherical pocket or cone in the platform and insert the ball and pin. Apply a force to the ball to squeeze out excess glue Wipe the excess epoxy glue away with some absorbent material wetted in isopropyl alcohol. Adding the pin will prevent rotation of the ball and dramatically increase the shear strength of the joint. A wide variety of sizes of both Hard Stainless Steel or Tungsten Carbide balls with a blind hole are commercially available. (See: “Ball” for a technical description of spherical geometry). (See “Ball” for a technical description of spherical geometry.) (See “Hard Stainless Steel”)(See “Tungsten Carbide”) (See “Sphericity of a ball”) (See “Electrical Discharge Machining”).
Ball with a Blind Threaded Hole

A complete ball with a threaded hole in it is a powerful way to better secure the ball to the kinematic platform. Machine a spherical pocket to match the diameter of the ball. A female cone can be used but it is much less effective. Add a concentric threaded hole in the center of the pocket. Apply epoxy glue to the surface of the spherical pocket, or cone in the platform.
If you are using a blind threaded hole in the platform, screw a set screw partly into the ball. Now screw the ball into the spherical pocket. An alternative approach is to drill a clearance hole all the way through the platform and pull the ball into the spherical pocket, with a threaded cap screw, from the back. Wipe the excess epoxy glue away with some absorbent material wetted in isopropyl alcohol. This is one of the strongest and most reliable methods of mounting a ball in a kinematic system. A wide variety of sizes of balls with a blind threaded hole are commercially available in both Hard Stainless Steel and Tungsten Carbide. (See: “Ball” for a technical description of spherical geometry). (See “Ball” for a technical description of spherical geometry.) (See “Hard Stainless Steel”)(See “Tungsten Carbide”) (See “Sphericity of a ball”) (See “Electrical Discharge Machining”).
A Ball with a Flat, a through hole, and a Counter bore
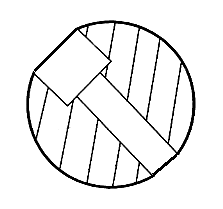
A ball with a flat, a through hole and concentric counter bore is a powerful way to secure the ball to a kinematic platform, from the front side. This design is used when the ball can only be secured from the front. This design only requires a threaded hole in the matching kinematic platform, or a through hole with the cap screw secured by a nut. These parts usually have a recess in the center of the flat to provide a shallow reservoir for a stronger glue line. These elemental parts are usually epoxy glued in place on the platform, but in lightly loaded situations, they can simply be locked in place by a socket head cap screw.
If they are epoxy glued down to the platform, the excess glue should be wiped away with some absorbent material wetted in isopropyl alcohol. A down side of this mounting method is that Electrical Discharge Machining of the through hole and the counter bore is expensive. This design also results in potential damage to the mating kinematic elements on the opposite platform due to their physical contact with the open edges of the counter bores. A wide variety of sizes of these balls are commercially available in Hard Stainless Steel and Tungsten Carbide. (See “Ball” for a technical description of spherical geometry.) (See “Ball” for a technical description of spherical geometry.) (See “Hard Stainless Steel”)(See “Tungsten Carbide”) (See “Sphericity of a ball”) (See “Electrical Discharge Machining”).
A Ball with a Flat and a Blind Hole
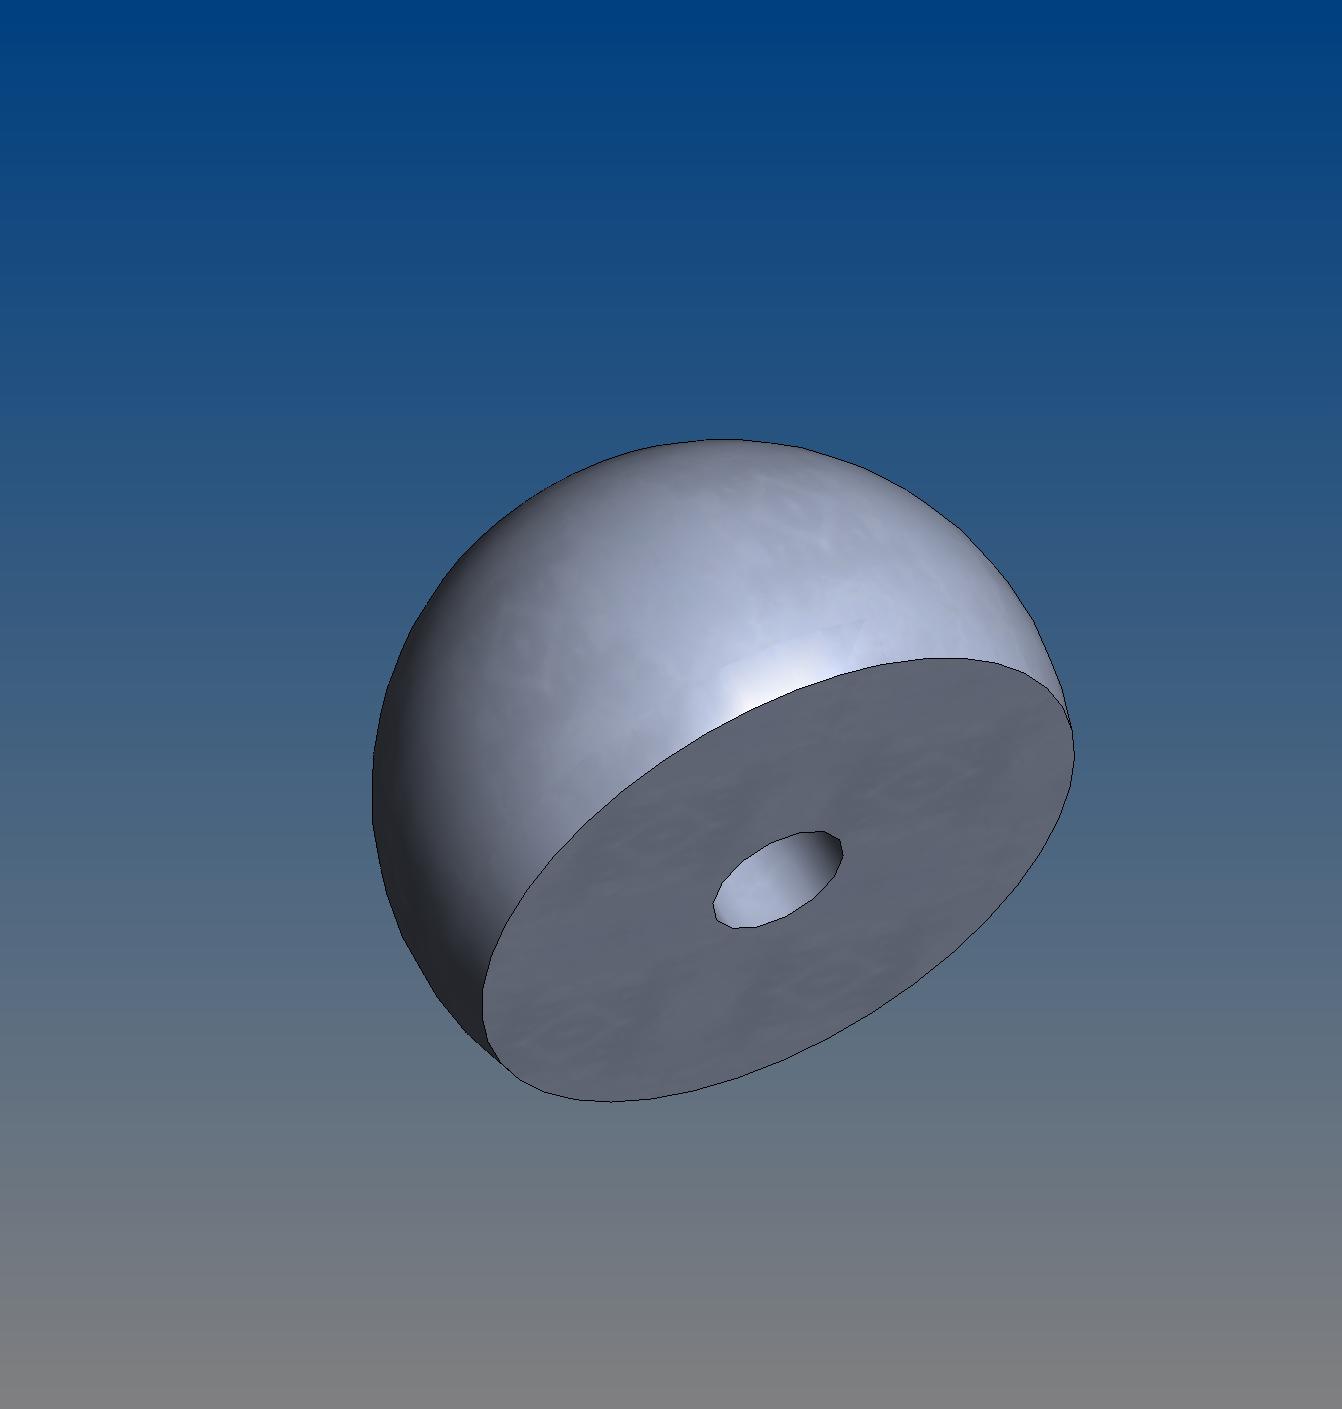
A ball with a flat and a blind hole is a powerful mounting method which is still inexpensive. A pin is press fit or epoxy glued into the platform. The Ball with the flat and a hole is then epoxy glued over the pin against the platform. These parts are usually recessed in the center to provide a shallow reservoir for a better glue line. Apply pressure to the top of the ball to squeeze excess glue out of the joint. Wipe the excess epoxy glue away with some absorbent material wetted with isopropyl alcohol.
Adding the pin will dramatically increase the shear strength of the joint. A wide variety of sizes of these balls are commercially available in both Hard Stainless Steel and Tungsten Carbide. (See: “Ball” for a technical description of spherical geometry). (See “Ball” for a technical description of spherical geometry.) (See “Hard Stainless Steel”)(See “Tungsten Carbide”) (See “Sphericity of a ball”) (See “Electrical Discharge Machining”).
Ball with a Through Hole and a Counter bore

A complete ball with a through hole and a concentric counter bore is a powerful way to secure the ball to the kinematic platform from the front side. This design is used when the ball can only be secured from the front. Machine a spherical pocket to match the diameter of the ball, into the platform. A female cone can be used but it is much less effective. Add a concentric threaded hole in the bottom of the spherical pocket, or drill a through hole and secure the cap screw with a nut.
Apply epoxy glue to the surface of the spherical pocket, or cone in the platform and insert the ball. Insert a socket head cap screw and tighten it enough to secure the ball. Wipe the excess epoxy glue away, with some absorbent material wetted with isopropyl alcohol. From a mechanical standpoint this is an excellent method for mounting a ball in a kinematic coupling. The down side of this design is that, it is expensive to Electrical Discharge Machine the through hole and the counter bore. The really bad result of the open counter bore is the potential damage to the mating kinematic elements on the opposite platform, due to physical contact with the open edges of the counter bores. A wide variety of sizes of these balls are commercially available in both Hard Stainless Steel and Tungsten Carbide. (See: “Ball” for a technical description of spherical geometry). (See “Ball” for a technical description of spherical geometry.) (See “Hard Stainless Steel”)(See “Tungsten Carbide”) (See “Sphericity of a ball”) (See “Electrical Discharge Machining”).
Brinelling
Brinelling is a permanent deformation or dent made in the surface of a part by a ball motivated by a load that causes stresses that exceed the elastic limit of the material. This shiny, very circular, mark or dent is used to evaluate the hardness of a material; but it is also very characteristic of damage to the surfaces of kinematic couplings that are subjected to very heavy loads or to shock. A moderate level of Brinelling may only slightly deteriorate the function of a kinematic coupling, and it will dramatically increase the future load carrying capacity of the coupling without further damage. (See “Permanent Deformation”) (See Mathematical calculations on the M.I.T. web site). The Brinell marks are very visible on the flat surfaces of a kinematic coupling; but long before this damage can be seen, less evident damage to the point contacts of the spherical, cylindrical or male conical surfaces will already have occurred.
Capture Envelope
The capture envelope of a kinematic coupling is simply that zone in which the two kinematic platforms will freely mesh. The capture envelope of a kinematic coupling can be an important design consideration. When the two sections of a kinematic coupling are brought into physical contact, these two sections must fall within the capture envelope, or the coupling will not mesh. Designing the kinematic coupling with component parts that have a broad capture envelope, is a good approach to solving this dilemma. Carefully avoiding component parts that have interrupted contact surfaces, is another must. If failure to couple will have serious consequences then using a guided kinematic coupling is a “must”. (See “Guided Kinematic couplings).
Canoe Sphere
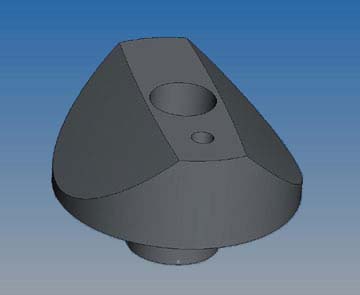
The Canoe Sphere which is used for carrying very heavy loads, is a monolithical structure, consisting of two off center spherical segments, of a forty inch (1 meter) diameter sphere. The two spherical segments are precision ground symmetrical with a three quarter inch (19mm) diameter, precision ground cylindrical post, which is used for mounting these components. The excellent geometry, good surface finish and near perfect symmetry of the spheres, provides micro inch (sub micron) repeatability, when used in conjunction with a precision prismatic vee block.
Each one of the canoe spheres, in combination with a high quality prismatic vee block will safely carry a 5000 pound 2268 kg payload. This means that, three of the Canoe Sphere, Vee block combinations, will safely carry a 15,000 pound ( 6804 kg ) load. The Canoe Sphere is manufactured from Hard Stainless Steel. (See “Hard Stainless Steel”) (See: technical papers published by Dr. Alex Slocum, M.I.T.)
Cathedral Arch
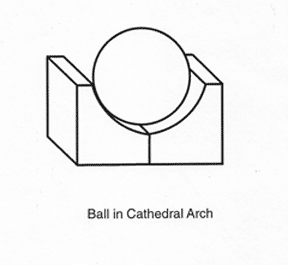
A Cathedral arch can be used in a kinematic coupling, as an alternative to a Vee Block, to constrain two degrees of freedom. This design consists of two off axis segments, of internal cylinders, in a monolithical form. The Cathedral arch can also be used in a split kinematic design. (See “Split Vee Block”). The advantages of the cathedral arch, when used in a kinematic coupling, are that they have a much higher load carrying capacity and a much higher resonate frequency than any other Vee Block design. Both of these qualities are due to the additional wrap around of the internal cylindrical shapes of the Cathedral Arch, with the mating sphere. The very exotic cathedral arch is only used to achieve exceptional results, so very stiff ceramic and cermet materials are normally used in their construction. The disadvantages of the cathedral arch are the very high cost of manufacture and the extreme technical difficulty in achieving the required geometric quality and the excellent waviness and surface finish required for a good function of the overall kinematic coupling.
Components of a Kinematic Couple
The component parts of a kinematic couple, are the functional combination of elemental parts, forming a complete sub-system.
- A Vee block
- is a component part, consisting of two flat inclined elements. A trihedral clamp is a component part, consisting of three flat inclined elements. A rose bud is a component part, consisting of three rose petal elements in an assembly.
- Cone:
- A Three Male Cone and Six Cylinder Kinematic Coupling – Two male cylinders, mated with a male cone, form a powerful, albeit unusual, kinematic couple.
An unusual application for this couple is to create a nearly single axis of adjustment for a kinematic couple by rotating a cone mounted exocentric to a cylindrical post. The male cone and cylinder arrangement has a higher load carrying capacity and a higher resonate frequency than two cylinders and a sphere, or two spheres and a cylinder. Male cones with concentric mounting cylinders are commercially available with 60 and 90 degree included angles, made of hard stainless steel. Cones with eccentric, cylindrical mounting posts must be custom manufactured. (See “Hard stainless steel”).
Chocking Effect
The chocking effect in kinematic couplings, is that often times, minute particles of turbidity (dirt) get into the area between the kinematic elements, thus causing gross errors in repeatability. These errors are many times greater than the thickness of the particles that cause the error. This is due to the breaking of the moving platform by these tiny chocks, long before it reaches mechanical equilibrium. To better exemplify this common and very serious condition, think of the small tapered blocks “chocks” that are used to keep giant airplanes from rolling. (Our understanding of this condition was solidified by work done by Jim Cumming at Lawrence Livermore National Lab).
Cone, a Vee And a Flat Mated With Three Spheres
This combination of elemental and component parts is pseudo kinematic. The ring or line of contact between the female cone and the sphere is over constraint, which will prevent a coupling of this design from accurately repeating. Undercutting the face of the female cone in three equiangular places will improve the repeatability of this couple. When the temperature of this coupling changes the cone and sphere will maintain its original position while the other two legs of the coupling expand or contract.
The load carrying capacity of this kinematic coupling is limited by the diameter of the ball used against the flat and the material that they are made of. Hardened stainless steel 90 degree female cones, 90 degree prismatic vee blocks and precision flats, as well as spheres, are commercially available. (See individual items separately). (See “Hard Stainless Steel”)
Constraint
Constraint, in kinematic terms, is to hold or to locate one of the six degrees of freedom of one body in a fixed relation to another body. Proper constraint is limited to one only point of contact for each one of the six degrees of freedom. From a purist standpoint, as soon as the two points come into physical contact, there will be some elastic compliance due to Hertzian elastic deformation. This forms at least some area of contact, so that the joint is no longer truly kinematic. It is this insight, that dictates that the quality of the geometry and surface texture of the two contacting surfaces of a kinematic couple should be excellent, and that both surfaces should be as stiff as possible. You need polished surfaces with the highest Young’s Modulus of elasticity possible. (Thanks to Dr. Steven Phillips of NIST for the insight into the importance of the contact distortion).
Cylinder
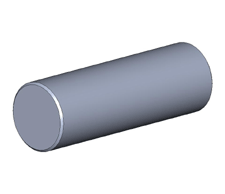
A truncated cylinder is simply a straight cylinder with a flat ground on it. Truncated cylinders are usually recessed in the center of the flat to provide a shallow reservoir for glue, to improve the strength, of the glue line. Using a Truncated cylinder is one of the least expensive ways of mounting a cylinder for kinematic applications. These truncated cylinders are simply glued to a flat surface, with a high strength epoxy glue. A much more reliable mounting method is to epoxy glue the truncated cylinder into a shallow close fitting trench machined into the platform. This design provides a high shear strength mounting. Pressure should be applied to the cylinder during gluing to force excess epoxy glue out of the joint.
Wipe the excess epoxy glue away, with some absorbent material, wetted with Isopropyl Alcohol. Truncated cylinders are commercially available in both Hard Stainless Steel and Tungsten Carbide. (See “Cylinder” for a technical description of cylindrical geometry). (See “Hard Stainless Steel”)(See “Tungsten Carbide”) (See “Cylindricity” for a technical description of measuring cylindrical geometry).
Cylinder, Truncated with Counter bored through Holes
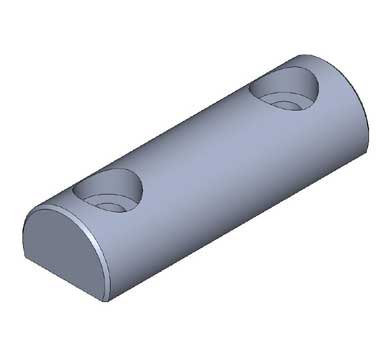
The truncated cylinder with counter bored holes is a good method for mounting, when the cylinder can only be mounted from the front side. Socket head cap screws are screwed into matching threaded holes in the kinematic platform. These truncated cylinders are provided with a shallow recess in the flat surface, that increases the glue line, when epoxy glue is used to secure the cylinders to the kinematic platform.
The down side of this design is that, it is expensive to Electrical Discharge Machine the through hole and the counter bore. The really bad result of the open counter bores is the potential damage to the mating kinematic elements in the opposite platform, due to physical contact with the open edges of the counter bores. When the truncated and counter bored cylinder is glued down, wipe the excess epoxy glue away with some absorbent material wetted with Isopropyl Alcohol. These truncated and counter bored Cylinders are commercially available in both hard stainless steel and Tungsten Carbide. (See “Cylinder” for a Technical description of a Cylinder). (See “Hard Stainless Steel”)(See “Tungsten Carbide”) (See “Electrical Discharge Machining”) (See “Cylindrically for a technical description of measuring cylindrical geometry”).
Cylinder, Truncated and Threaded
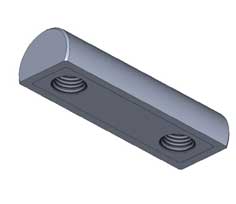
The truncated and threaded cylinder, is the most ideal mounting method for most kinematic applications. A Threaded hole near each end of the cylinder provides a simple robust method for mounting the precision lapped cylinders. These truncated cylinders are provided with a shallow recess in the flat surface, that increases the glue line, when epoxy glue is used to secure the cylinder to the kinematic platform.
When glue is used, wipe the excess epoxy glue away with some absorbent material wetted with Isopropyl Alcohol. These truncated and threaded kinematic cylinders are commercially available in both hardened stainless steel or tungsten carbide. The cylinders are rigidly pulled into good physical contact with the flat surface of the kinematic platform by threaded fasteners, from behind. (See “Cylinder” for a technical description of a cylinder) (See “Hard Stainless Steel”)(See “Tungsten Carbide”) (See “Cylindricity” for a technical description of measuring cylindrical geometry).
Dead Weight
There is a certain minimum force required to elastically set the two kinematic platforms (Nesting Force) to provide mechanical stability. When the mass of the payload and the weight of the upper platform do not provide an adequate preload, to stabilize the kinematic system, additional weight may be added, or other forms of preload may be used to supplement the dead weight. Dead Weight is the force of gravity acting on the mass of the payload and that of the upper platform of the kinematic coupling. The use of Dead Weight to provide the Nesting Force required, can only be used when the kinematic platforms are nearly perpendicular to gravity. A symmetrical Dead Weight, is the very best form of preload for kinematic couplings.
Degrees of Freedom, The
There are six potential degrees of freedom for any mechanical body.
There are three linear degrees of freedom. There is the side to side or left to right movement, which is the “X” axis. There is the in and out or front to back movement, which is the “Y” axis. There is the up and down movement, which is the “Z” axis. There are three rotary degrees of freedom possible. Each one of the rotary degrees of freedom occurs around one of the linear axii. The rotation that occurs around the “X” axis is roll. The rotation that occurs around the “Y” axis is pitch. The rotation that occurs around the “Z” axis is yaw.Electrical Discharge Machining
A basic knowledge of what E.D.M. is, how it works, and what it can do, is an absolute must for today’s kinematic designer. An E.D.M. uses sparks of electricity to “burn” or “erode” material away from the part being machine. The part being machined is separated from the electrode or tool of the E.D.M. machine by an electrolyte or dielectric fluid. The dielectric can be pumped between the electrode and the part or both the electrode and the part can be submerged in a tank full of the dielectric. Pulses of electrical energy are applied between the electrode and the part. When the electrode is brought close enough to the part sparks of electrical energy discharge between the gap. Each one of these sparks of electrical energy super heats a tiny spot on the surface of the part being machined. This burst of energy liquefies that tiny spot and the cooling action of the electrolyte expels a tiny ball of metal leaving a spheroid in the surface. This action takes place thousands of times per second.
Compared with mechanical cutting processes, E.D.M. is a very slow process. Where drilling a hole takes only seconds on a turning or milling center, it takes multiple minutes on an E.D.M. machine, but an E.D.M. machine can cut the hardest materials and it can machine ultra precise parts without distortion or damage and E.D.M. is burr free. There are basically two forms of E.D.M. machine. There is the Die Sinking machine which closely resembles a vertical milling machine or Jig Borer, with a tank surrounding the work table. This type machine is used for drilling, shaping, and threading parts. The second type machine is the Wire E.D.M. machine. Theses machines are something like a vertical band saw but with a wire instead of a blade to do the cutting. Theses machines are fully computer controlled with complex multi axis capability. It is these machines that make possible the production of the complex cross sections such as the rose bud and the quarter round. It is this machine that has opened the door to the production of very complex monolithically kinematic assemblies. See our web page on EDM.
The Elements of a Kinematic System
An element of a kinematic system, is the smallest stand alone, functional part, of the system. Examples would be a sphere or ball, a flat and a cylinder. One plane of a Vee Block would be an element, but the complete Vee block would be a component part. One petal of the rose bud, would an element, but the complete three petal rose bud would be a component part. Each facet of a trihedral clamp would be an element, but the complete trihedral clamp would be a component part.
End Stop
See “Hard Stop”Epoxy Glue
There are two basic varieties of epoxy glues, typically used to secure the elements and components to the platforms in kinematic systems. For normal everyday gluing applications in the ambient environment, a very high strength (3000 PSI pounds per square inch shear strength) epoxy glue, with a powdered aluminum oxide ceramic filler, is used. The inclusion of the powered ceramic filler virtually eliminates any elasticity in the glue joints.
Using barrel chemistry when mixing epoxy glue is a very good investment. By this we mean, that you should mix a much larger than needed amount of glue. A small error in a small batch may cause large problems, but a small error in a larger batch is of no consequence. The unused material left over from a mix will provide material that can be hardness tested (Durometer test) as the simplest way of assuring the quality of a batch of glue. It is very desirable to use a two equal part by volume, formula epoxy, for kinematic applications. Only a very small amount of epoxy glue is used, at one time, so it saves a lot of time and money, to just mix an equal stripe of epoxy and a stripe of catalyst together, instead of all of the weighing mixing and refrigerating associated with commercial batch processing of epoxy resins.
The actual mixing of the two stripes of materials should be done on a clean dry surface. The surface of a polyethylene bag with a card inside, to stiffen it, is excellent. Ideally a paddle like device with a flattened end, about 3/8 of an inch (10mm) wide makes a good stirring tool. To mix the strongest batch of glue possible, you must mix the two stripes of glue together without whipping any air bubbles into the liquids. Use a combination of slow circular and linear movements. Pull the ingredients into a pile and then move the pile to a new location. Do this several times and you can thoroughly mix the two stripes of material without getting, strength reducing air bubbles in the mix. For super critical applications the mixed glue can be placed in a soft vacuum chamber for a short time. Caution: placing some epoxy mixtures in a high vacuum can cause them to turn into foam. A common designation for high strength ceramic filled epoxy glue that is commercially available is “EG-3000.”
Epoxy Glue for Vacuum Applications
The second variety of epoxy resin is that used in high vacuum applications. After the initial chemical reaction, of this type epoxy glue, there is no further out gassing of this material. It is good practice, when using epoxy glue, in high vacuum applications, to provide extra vents that will eliminate any pockets of gas generated during catalyzation Epoxy Glue Testing- Each batch of epoxy glue mixed, should be tested for quality. Out of every thousand batches of epoxy glue that is mixed correctly, there may be an occasional one that may fail to harden properly. Be aware that the hardness may be “sticky” so that it stays soft, but it can also be too hard so that it is very brittle.
The hardness of epoxy resin is tested on the Durometer scale, and should closely match the manufacturer’s specification. It should not be too soft and it should not be too hard. The problem of epoxy glue failure has been researched extensively. Contamination of the mix is one of the possible causes of failure. Inclusion of a small amount of acetone will weaken a batch of glue slightly. Inclusion of a small amount of Isopropyl Alcohol doesn’t seem to affect the strength of the glue at all. Inclusion of the smallest amount of water will dramatically reduce the strength and a modest amount may keep the batch from ever hardening. Bad ingredients seem to be the most frequent culprit in epoxy glue failures. The only way to protect from this situation is to post test a sample of each batch of glue mixed.
The shelf life of an unopened factory sealed container of epoxy can be years, but after the container is opened it should be used within less than one year. Refrigerating the opened containers of epoxy will extend their safe shelf life. Using barrel chemistry when mixing epoxy glue is a very good investment. By this we mean, that you should mix a much larger than needed amount of glue. A small error in a small batch may cause large problems, but a small error in a larger batch is of no consequence. The unused material left over from a mix will provide material that can be hardness tested (Durometer test) as the simplest way of assuring the quality of a batch of glue. The most effective test for the quality, of a batch of epoxy glue, is to make a pull test of a glue joint. Coat a controlled area of a joint between two pieces of clean sheet metal and then pull test the cured joint to destruction. The number of PSI (pounds per square inch) [or the metric equivalent], needed to pull the two pieces apart, is the one true test of the quality of a batch of glue.
EG-3000
See epoxy glue
Fail Safe Kinematic Coupling
There are times when no matter what happens, the kinematic coupling must not separate, or fall apart. Some of these situations can be life threatening, but in most cases it involves the extreme cost involved if the two parts of the kinematic coupling separate, Simple mechanical devices that automatically self-align in all degrees of freedom are the typical solution. This mechanically preloading system was originally developed to protect an unbelievable expensive crystal lens for a telescope. (See “Mechanical Preload” for the outline, of a typical fail safe system).
Flabby - Whitehead 1938
See loosy Whitehead 1938
Flat Surface
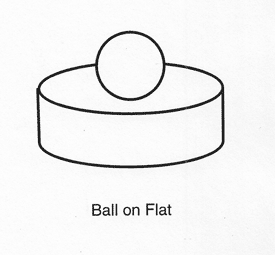
A flat surface is one of the fundamental elements used in many kinematic couplings. A perfectly flat surface is defined as a geometric figure with an infinite radius of curvature. The geometry of a flat surface can be verified absolutely, by comparing it with the curvature of the earth’s surface, through reversal technology, or through Plano Interferometry, with a traceable calibration. The geometric and surface quality of the flat surface, used in a kinematic coupling is one of the limiting factors in its performance. Flat surfaces used in kinematic applications should be very stiff with excellent geometry and good surface quality. For more information, see our web page on "Plain Flat Kinematic Components."
Flat, Surface Mounted
The surface mounted flat kinematic element, is provided with a threaded hole on the rear surface to rigidly mount it to the kinematic platform. The surface mounted flat can be screwed down on to an embedded set screw. It can be pulled down with a cap screw from behind. A set screw or threaded stud can be screwed into the threaded hole and clamped from behind with a nut. These elemental components have a central recess on the back surface, that leaves a flat lapped annuls, which provides excellent location, with the mating surface, in addition to providing a reservoir for a stronger glue line. For more rigid permanent mounting, the surface mounted flat element can be epoxy glued to the kinematic platform. The surface mounted flat is commercially available in hard stainless steel and with a tungsten carbide insert. (See “Tungsten Carbide”) (See: “Flat Surface” for a technical description of a flat). (See “Hard Stainless Steel”)
Fretting
Fretting can become a serious problem in heavily loaded or frequently actuated kinematic couplings. The elastically deformed interfaces between the kinematic elements can reach levels of stress where cold welding or diffusion bonding takes place. At first these bonds are on a molecular level, but as chemical reactions and metallurgical changes in the interfaces grow, macro deterioration takes place. With each insertion and extraction of the degraded interfaces, the damage increases until the repeatability of the kinematic coupling is no longer functional. (see “Short Stroke Wear” for further technical data)
Gibbing Kinematic Components
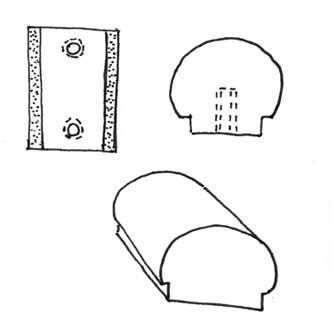
When two cylinders of a kinematic couple are used at a skewed angle to the third cylinder, instead of at right angles to it, the contact force will tend to cause rotation of the two skewed cylinders. A good way to counter act this rotational tendency is to machine the lower or contact surface of the cylinder to form a rectangular gibb. This gibb is fitted into a shallow close fitting rectangular trench. This shallow rectangular trench can be economically machined into the mounting surface on the platform by milling. When applicable, any of the conventional kinematic components, cylinders, balls, vee blocks etc. can be produced with a built in gibb. Gibbing is not an inexpensive process, as it is usually done by wire electrical discharge machining after all grinding and lapping has been completed.
The Geometry
What we are discussing here is the geometry of the kinematic elements only. In a general way, the surface finish and the waviness are outside the domain of geometry, i.e. the general form or figure of machined surfaces. To truly comprehend these concepts, we have to become some what academic. The domain of waviness is generally considered to be undulations that extend from a wave length of 0.030 inches (.75mm) up to 0.100 inches (2.54 mm). Surface finish or micro finish are those undulations with short wave lengths, up to 0.030 inches (.75mm).
The Geometry then, is what is left, over which is the figure of the surface, that is over 0.100 inches (2.5 mm). For good function in high quality kinematic applications, you must be very sure that you understand that the strict academic definition of geometry will not suffice. The importance of sphericity, cylindricity and plainetude extend all the way down to the shortest wavelengths of the geometric spectrum. For high end kinematic applications, the importance of the geometry of the elemental surfaces does not end at one hundred thousands of an inch or two point five four millimeters. To add to the complexity, surfaces of rotation such as cones, cylinders and spheres often have the surface quality broken down on the basis of the number of undulations per revolution. Surface finish extends from 45 to 450 undulations per revolution. Waviness is 15 to 45 undulations per revolution and geometry is zero to 15 undulations per revolution.
Giant Kinematic Structures
See canoe sphere
A Gothic Arch
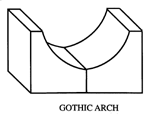
A Gothic arch can be used in a kinematic coupling, as an alternative to a Vee Block, which can constrain two degrees of freedom. This design consists of two off axis segments of internal cylinders in a monolithical form. The Gothic arch can also be used in a “split” design (see Split Vee Block). The advantages of the Gothic arch when used in a kinematic system, are that they have a much higher load carrying capacity and a much higher resonate frequency than any other Vee Block design. Both of these qualities are due to the additional wrap around, of the internal cylindrical shape of the Gothic Arch. The very complex Gothic Arch is only used to achieve exceptional results, so very stiff ceramic or cermet materials are normally used in their construction. The disadvantages of the Gothic arch are the very high cost of manufacture and the extreme technical difficulty in achieving the required geometric quality, the excellent waviness and surface finish required for a good functioning kinematic coupling.
Guided Kinematic Coupling, The
The elements of a kinematic coupling can be damaged by impingement on the mating parts of the opposite platform when trying to engage the two platforms. The larger the platforms, the more difficult the safe engagement will be. The two sections of a kinematic coupling can be guided into soft contact, by erecting three risers. Two on one edge and one on the end of one platform, or you can use three bullet nosed cylindrical posts that engage three oversize holes in the opposing platform. After the proper engagement of the kinematic coupling, there should be no physical contact between any of the risers or posts and the opposite platform.
The Hard Stop
The Hard Stop is a special application kinematic couple. It is used to accurately terminate the travel between two sections of a precision mechanism. The action of a hard stop is to bring a very accurate very stiff sphere into physical contact with a very flat, very stiff surface. One of the elements of the hard stop is typically adjustable, true a fine pitch thread and a jam nut. Using this simple technique, the end positioning of a mechanical slide to micro inch (sub micrometer) accuracy can be achieved.
Stiff components with very precise geometry and fine surface texture are required to minimize the inconsistent elastic compliance between the physical bodies of the system. Hard stops with Tungsten Carbide or hard stainless steel elements are commercially available (See “Ball”) (See “Flat”) (See “Tungsten Carbide”) (See “Hard Stainless Steel”).
A Heavy Load Kinematic Couplings
See Canoe Sphere
Hertzian Elastic Deformation
For kinematic coupling applications, Hertzian Elastic Deformation is more than a simple principal it is a key phenomenon. To master the design of sophisticated kinematic couplings with nanometric repeatability, a realization of just how compliant the surfaces of even the best engineering materials are is essential. Among the practitioners of the science of kinematic couplings, terms like: bubble gum, rubber bands and wet noodles are a part of their everyday jargon. When the fast contours of the elemental parts that form a kinematic couple come into physical contact, elastic deformation of both parts occur immediately. From a purists standpoint, when this happens there is an area of contact between the two elements and the couple is no longer perfectly kinematic.
The principles that must be mastered are that the contacting surfaces must be as stiff as possible and that the finest surface texture possible must be maintained to provide a slippery slope between the elemental surfaces. Basic Hertzian equations tailored to each contact geometry can predict the safe load carrying capacity of a couple. Safety margins should be factored in to allow for instantaneous increases in the loads due to vibration and shock. It should be remembered that the true plastic (permanent) deformation of the contact surfaces occurs at the Proportional limit and not at the yield point. (See “Proportional Limit”) (See “Yield Point”). (See the M.I.T. Web site for algorithms to calculate the safe load carrying capacity.)
High Load Kinematic Couplings - (see Canoe Sphere)
Hinge
A kinematic hinge can provide an almost perfect axis of rotation. The three linear degrees of freedom, can be constrained by using a sphere in a trihedral cup. For a lightly loaded situation, a sphere in an inexpensive three ball kinematic couple can be substituted. For the ultimate in accuracy, a sphere in a Rose Bud couple is the answer. This will give excellent location and a reasonable load carrying capacity. The pitch and yaw degrees of freedom can be removed from the system by using a sphere in a prismatic Vee Block. Two parallel cylinders can be used as an excellent substitute for the prismatic vee block, when only light loads are involved.
For the ultimate quality, a pair of parallel quarter rounds can take the place of the Vee Block. This approach will give excellent performance with a good load carrying capacity. The kinematic hinge finds rather wide applications in the field of precision engineering. It provides near perfect “Z” axis repeatability, in “tilt and insert” situations. It produces near perfect function, in all of the degrees of freedom, for pick and place applications. The kinematic hinge solves one of the most difficult and most common problems of kinematic couples, which is getting “loosy” out of vertical kinematic couplings. (See: loosy) (See: Vertical Kinematic couplings)
The Kelvin Clamp
The Kelvin clamp is an equilateral, three facet female prismatic component used in kinematic couplings. The first publication of this technique was by Lord Kelvin, 1868-71. When a ball sits tangent against the three prismatic facets of the Kelvin clamp, it will be constrained in the three degrees of linear freedom. In the interest of economics and quality, the Kelvin clamp is usually constructed of three individual prisms, mounted separately to produce tangent contact with the ball or spherical segment. The commercially available design consists of three cylindrical posts truncated at 45 degrees and precision lapped flat. These are available in both hard stainless steel and tungsten carbide. The Kelvin clamp can be ground as a monolithical structure by passing a saucer shaped grinding wheel through the openings in the structure at the 120 degree intervals, as demonstrated by Douglas Blanding in 1989. (See “Hard Stainless Steel”) (See “Tungsten Carbide).
Kelvin Kinematic System
The first publication of this technique was by Lord Kelvin, 1868-71. The general concept is that the Kelvin system consist of three spheres mated to a conical cup a vee and a flat. In reality the Kelvin clamp ideally consists of a trihedral prism a vee block and a flat in contact with three spheres. A cone provides a line of contact with the mating sphere, which by its very nature cannot be truly kinematic, because a line of contact is over constraint. Lord Kelvin discussed the possible use of a cone truncated three times to leave three points of contact. By undercutting the internal conical surface in three places a much more accurate device can be constructed. The trihedral or Kelvin clamp is an extremely powerful kinematic component. A practical, high quality, trihedral clamp has been a long time coming. By precision lapping a high quality facet truncated on a cylindrical post, the ultimate design for a Kelvin clamp is achieved. By mounting three of these cylindrical posts in a 120 degree pattern the perfect Kelvin clamp is realized.
A very economical three ball kinematic couple can be substituted for the trihedral clamp when only a light load is involved. When more versatility of design and a higher load carrying capacity are desired the “Rose Bud” design can be used. (See: Rose Bud). When there is a change in the temperature of a system using a Kelvin kinematic coupling, the position directly above the trihedral retains its original position and the rest of the platform breathes around it. (See “Trihedral Clamp”). There has been much controversy over whether the Maxwell or the Kelvin kinematic coupling is more accurate. I can say from personal experience that a well constructed Maxwell system repeated within one micro radian, over one hundred and twenty thousand insertions and extractions. I can also say that a Kelvin clamp repeated within one nanometer over eight hundred cycles. I believe that the basic design, the choice of materials and the workmanship are far more important than whether a Maxwell or a Kelvin system is used.
A Keystone Kinematic Coupling
The appearance of a keystone kinematic coupling is that of a keystone, with a steeply inclined V shaped mouth or opening. One of the top features of the keystone coupling is the very long, self aligning approach, between the two platforms. This design of the keystone coupling requires careful attention, as it is very prone to loosy (See: loosy in the Technical Papers section of http://www.precisionballs.com ). The tongue, or male, shaped platform is usually made up of two male vees, but two cylinders are sometimes used. The mating components in the mouth, or female, section of the keystone are typically sections of large radius spheres, based on the “Around the Corner” concept . (See: David Kittell, 1968)
Lapped Surfaces
Lapped surfaces, on kinematic elements, offer several distinct advantages over well machined or precision ground surfaces. Lapping causes a dramatic improvement in surface finish. A very well ground surface will seldom be better than a 4 micro inch (0.1 micrometer) Ra while a lapped surface will typically be 1 micro inch (0.025 micrometer) Ra, and can be as good as 0.1 micro inch (0.0025 micrometer) Ra. In addition to the dramatic improvement in surface finish, the metallurgy of the surface is changed dramatically, by lapping. The smeared surface of non-crystalline material left by fine grinding is removed. (See: Dr. Swigart) A simple fact is that the immediate surface of a part ground by an abrasive wheel, going 5000 surface feet per minute (one mile per minute) was at least momentarily at close to 5000 degrees Fahrenheit. The evidence proving this is that this is the temperature at which steel incinerates causing visible sparks. This is very important, because this highly stressed layer of smeared material is much more chemically active than the base metal of the part. This condition promotes short stroke wear and fretting. (See: this encyclopedia) In contrast to the high surface speed of grinding, the surface speed of the lapping process is only 100-300 surface feet per minute.
Waviness on the surface of kinematic elements is the most wear producing condition. The smothering process (wrap around) of all the basic geometry lapping procedures reduces the waviness to well below the measuring threshold of almost any inspection device.
Large Kinematic Structures
The Linear Degrees of Freedom
There are potentially three linear degrees of freedom, for any mechanical body. It can move left to right or side to side, which is the “X” axis. It can move in and out or front to back, which is the “Y” axis. It can move up and down, which is the “Z” axis.Loosy
Loosy is the manifestation of an unexpected, unintended and undesirable lack of location or repeatability. In a kinematic coupling, loosy is often a design weakness. It is a combined weakness in the structural elasticity and the choice and placement of the kinematic elements. It tends to manifest itself in marginal kinematic coupling designs, that are off perpendicular with gravity or that have large aspect ratios. There is a good deal of material on how to minimize loosy in the literature. The Keystone Kinematic Coupling is very prone to loosy. (See: technical paper Loosy Kinematic Couplings)
The Lotus Wrench

The truncated and threaded ball (T.B.R.T.) is by far the most popular method of mounting balls for kinematic applications. Often it is desirable to screw these T.B.R.T.’s down, on a threaded stud, from the front side of the kinematic platform. The brass jaws of the Lotus wrench will rigidly clamp the T.B.R.T., so that it can be screwed down tight, without incurring any damage to the ball surface. A full set of lotus wrenches of various sizes are commercially available. (See “Truncated and Threaded Balls”).
Lubrication
Lubrication of the kinematic coupling may be required in situations where heavy loads and or frequent insertions and extractions are required. The basic problem with lubrication is that it traps particulate on contact and in a short time the repeatability of the kinematic coupling is diminished. When possible, install a shroud or shield to keep foreign material away from the contacting surfaces. In a relatively short period of time, standard lubricants become gummy through oxidation and the coupling will badly malfunction. The best form of lubrication for a kinematic coupling are those used in high vacuum applications. The chemistry of these lubricants are usually silicon based, rather than carbon based, so it doesn’t break down over extended periods of use.
Magnetic Preload
Kinematic couplings require a certain minimum load (nesting force), to mechanically stabilize them. A very popular method of preloading a kinematic coupling is by applying an attractive magnetic field between the two kinematic platforms, that will pull them together. Repeatability, in the nanometric range, has been achieved using the magnetic preloading technique. The beauty of the magnetic preload is that it is “cushy”. An easy way to visualize the magnetic field, in a kinematic application, is to think of it as a candle flame. The exact alignment of the magnetic field is not at all critical. Stray magnetic fields can be eliminated by placing the magnet in a shroud, or cup, of high permeability material. The strength of the magnetic field can be accurately adjusted by placing the magnet in a cup that is threaded on the outside diameter. By rotating one or both of the threaded magnetic cups the force of the magnetic pull can be accurately adjusted, to achieve the desired preload. Rare earth magnets mounted in threaded high perm cups are commercially available.
See our web page titled " Magnetically Preloaded Kinematic Couplings."
A Male Vee
A male Vee with two flat prismatic faces is somewhat unusual but it is a very powerful kinematic device. A male vee and two balls or partial spheres will accurately constrain two degrees of freedom. Three male vees and six balls will form a complete kinematic coupling that will accurately position a kinematic coupling in all six degrees of freedom. The exposed flat faces of this prismatic device can be precision flat lapped and polished to provide much more accurate repeatability than a female prismatic Vee block. The flat prismatic faces, of the male Vee, have the same high load carrying capacity as a female prismatic Vee block and respond to changes to the included angle in a like fashion. (See “V-Block”) The male Vee’s are usually made of hard stainless steel (See “hard Stainless Steel”) (See “V-Block”).
The Maxwell Kinematic System
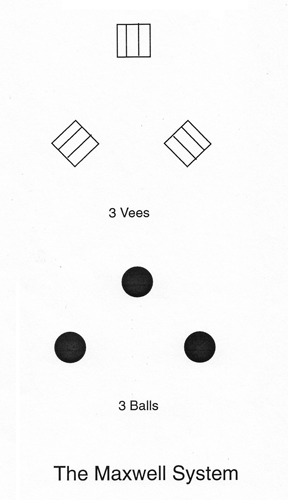
The principal of this kinematic system, was first published by James Clerk Maxwell in 1871. Fundamentally the Maxwell kinematic system consists of three spheres mated with three female vees. There are a number of variations on the fundamental Maxwell design. Instead of using flat prismatic vees, we can use two parallel cylinders to form each of the three vees. Instead of using female prismatic vees we can reverse the design and form a male prismatic vee that mates with two spheres. We can mate two spheres with a cylinder. Another seldom seen version of the Maxwell System is to use two cylinders inclined to form a vee, with a third cylinder riding in the notch of the vee at right angles. In a similar arrangement, two male cones can be used in conjunction with a cylinder in another unusual combination two cylinders in combination with a male cone will form a couple.
The Maxwell system is thermally stable, because each of the three symmetrical legs expands or contract in unison, as the temperature goes up or down. There has been much controversy over whether the Maxwell or the Kelvin kinematic coupling is more accurate. I can say from personal experience that a well constructed Maxwell system repeated within one micro radian, over one hundred and twenty thousand insertions and extractions. I can also say that a Kelvin clamp repeated within one nanometer over eight hundred cycles. I believe that the basic design, the choice of materials and the workmanship are far more important than whether a Maxwell or a Kelvin system is used.
A Mechanical Preload
Kinematic couplings require a certain minimum load (the Nesting Force) to mechanically stabilize them. A mechanical preload is a poor method of preloading a kinematic platform. Mechanical Preloading is very prone to off axis stressing of the kinematic coupling. “Z” axis variations in position occur due to the difficulty, of accurately repeating the forces applied, in the mechanical clamping process. There are times however, when a mechanical preload is the only practical method, to achieve acceptable preloading. To be successful, the mechanical preloading force applied between the two platforms, must be isolated from the kinematic coupling as nearly as possible.
Visualize using a threaded shaft and nut combination, to apply the mechanical preloading force. By rigidly mounting the threaded shaft to one platform and passing it through a clearance hole in the other platform, the “X” and “Y” axis misalignments are neutralized. By adding a spherical tilt in line with the Z axis, of the threaded shaft, errors in pitch and Yaw can be effectively neutralized. By placing an anti friction thrust bearing between the force applying nut and the spherical tilt, the “Z” axis hysteresis is reduced, so that all of the roll axis errors are greatly reduced. Controlling the force applied through the nut, by using a clocking mark on the nut, will minimize “Z” axis variation in elevation. The best that you can do when using mechanical preloading, is to control each of the individual variables, as close as possible.
The Modulus of Elasticity- The Young’s Modulus of Elasticity is very simply, the ratio of the stress that is applied, to the strain, that results, for a given material. The parameters of this test must remain within the elastic limits of the material being tested. It is in effect the stiffness of a particular material. The Young’s module's of elasticity for Aluminum is about 10,000,000 pounds per square inch. 300 series stainless steel and cast Iron is about 20,000,000 PSI, steel is about 30,000,000 PSI, ceramic is about 45,000,000 PSI, tungsten carbide is typically 100,000,000 PSI and diamond varies between about 600,000,000 and 900,000,000 PSI.
Micro Finish, The
See Surface Finish
Natural Frequency, The
See The Resonant frequency
The Nesting Force
The nesting force is that certain minimum force, or preload, required to elastically set the two kinematic platforms, to provide mechanical stability. This force will vary with the physical dimensions of the structures, the stiffness of the kinematic elements, and their overall quality. Other important factors that determine the required nesting force are the level of vibration in the environment and the geometric accuracy of the insertion of the transient platform with the stationary platform (see “Mechanical Preload”).
A Nine Cylinder Kinematic Coupling
This is an unusual configuration for a kinematic coupling, but it is widely used in electrical circuits to sense physical contacts. Each of the three individual couples consists of two cylinders inclined at an angle, to form a vee. The third cylinder rests in the notch like crook, that locates it securely, until some upsetting force pushes the crossed cylinder out of contact. Three sets of these individual couples are used together to form a complete contact-sensing kinematic coupling. Very precise ground and lapped cylinders are commercially available in a variety of diameters, in both hard stainless-steel and tungsten-carbide (see “Hard Stainless Steel”), (see “Tungsten Carbide”), (see “Cylinder” for a technical description of cylindrical geometry).
Over-Constraint
Over-constraint in kinematic terms is any contact between the two bodies that is more than what is absolutely necessary, to restrict any movement of the body in a single degree of freedom. In simple terms, this limits contact between the two bodies to one point of contact for each one of the six degree of freedom (see “Degrees of Freedom”). A line of contact, such as a ball in a female cone, is over constraint. Any area of contact, such as two flat surfaces in contact, is over constraint. More than one contact for any one degree of freedom is over constraint because it has redundant contact.
Over the Top Kinematic Coupling
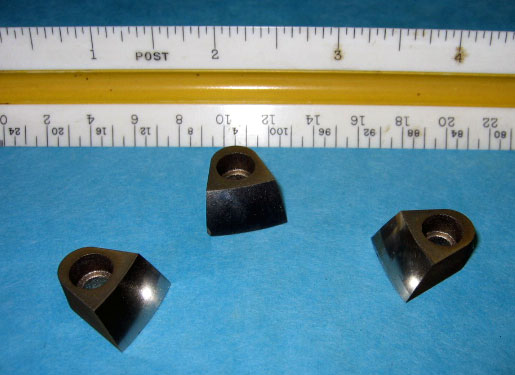
Over the Top is one of those special applications kinematic couples. This device provides an extremely wide angle of rotational freedom for the kinematic coupling. A typical design for the spherical parts of an “Over the Top” couple has a section, that is usually 90 degrees, cut out of the ball. This design provides a good method for mounting the balls, to the platform for a kinematic hinge or other rotary applications. In most applications, two of the notched balls are epoxy glued to one edge of moving platform. A threaded hole, can be provided at the apex of the 90 degree cut out, to provide more reliable mounting. Through the magic of Wire Electrical Discharge Machining, much more complex mounting configurations can be machined into the spherical section. These more complex cutouts include dovetails, pine trees, and key way like rectangles.
Permanent Deformation
The permanent deformation of the surfaces of a kinematic coupling is caused by the application of a load that exceeds the elastic limit of the elemental surfaces. This is often caused by brief shock to the system. Careless insertion of the mobile platform can cause shock induced permanent deformation. Permanent deformation often manifests itself as Brinell marks that are very visible on the flat surfaces. Long before these visible indications of Brinell show up on the flat surfaces, less obvious damage to the point contact surfaces of the spheres, cylinders or male cones will have already occurred. (See “Brinelling”) (See The Mathematical Calculations of stresses for kinematic coupling on the M.I.T. web site).
A Pivot
A ball or partial sphere constrained by a three degree of freedom component part will form a kinematic pivot. A list of these devices would include a female cone, the trihedral couple, the three ball couple, the rosebud, three male cones and three inclined cylinders. A kinematic pivot will constrain all three of the linear degrees of freedom, while allowing full freedom of motion in all three of the rotary degrees of freedom. This simple device can perform just as well or better than very bulky very expensive alternatives. An excellent example is the joint between a wobble pin (wobble bar-wobble shaft) and the driving or driven part of a system. (See “Wobble pin”) (See www.precisionballs.com) (See “W.B. Jones”) (See “Rose Bud”) (See “Tetrahedral Clamp”).
A Plane Surface
A Plane or Flat surface is one of the fundamental elements of many kinematic couplings. A prefect plane surface is defined as a geometric figure with an infinite radius of curvature. The geometry of a plane surface can be verified absolutely by comparing it with the earth’s curvature, through reversal technology or through Plano Interferometry. The geometric and surface quality of the plane surface, used in a kinematic coupling, is one of the limiting factors in its performance. Flat surfaces used in a kinematic coupling should be stiff, with a good geometry and a high quality surface texture.
The Preload
See Nesting Force
The Proportional Limit
The proportional limit of a material is that point, on the stress strain curve, that indicates true plastic deformation. It is the point at which the strain caused by a given stress becomes a fast moving curve instead of an inclined straight line. Up to the proportional limit, if the stress is removed, the test part returns to its original length. After this point is reached the test part is permanently elongated. Like everything else this is not exactly true. Some documentable slipping and twinning does occur, at minute fractions of the proportional limit, but for most practical situations these changes have no functional effect on the performance of a part. (See Curley Slip).
The Quarter Round
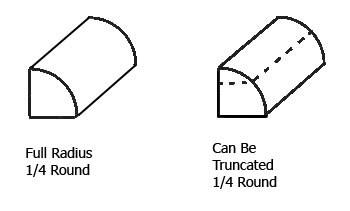
By cutting a ground and lapped cylinder axially into four sections, with a 90° cross-section, we create a totally unique kinematic element. Its first quality is that it is only one quarter as large as a complete cylinder of the same diameter. The flat right angle surfaces provide a simple, rigid method of mounting the quarter round You simply mill a rectangular trench and epoxy glue two of the Quarter rounds in, to form an effective Vee Block of the highest quality.
The large radius of the quarter round allows the higher preload required to achieve high resonate frequency. The distance between the two quarter sections of the cylinders in this vee block can be adjusted closer together or farther apart by controlling the width of the trench to provide any desired contact angle with the ball. The quarter round can have a threaded hole E.D.M.'ed into it, so that it can be held rigidly in place with a threaded fastener (screw). By using the quarter round, a much larger radius of curvature with much higher load carrying capacity can be used in the same restricted area.
Two of the Quarter rounds can be used to form a split Vee Block, kinematic couple. Quarter Rounds are commercially available in hard stainless steel and tungsten carbide. (See “Split Vee Block”-see also technical paper on www.precisionballs.com “Split Kinematic Coupling with out Abbé offset”)[See: “Cylinder” for a technical description of a cylinder]. (See “Hard Stainless Steel”)(See “Tungsten Carbide”).
Redundant Constraint
Redundant constraint is entirely different than most other forms of over constraint. Redundant constraint is simply that more than one point of contact is used to constrain one or more of the six degrees of freedom in a kinematic system. It is not always easy to recognize this problem. To do so each degree of freedom must be broken down and analyzed separately. The problem with redundant constraint, is the same as trying to get all four legs of a table to contact a hard surface, without wobbling. Redundant Constraint is not highly deterministic, because there is no way to know which three of the four legs will be the contact points, at any one time.
The Resonant Frequency
The resonant or natural frequency of a kinematic coupling, to put it simply, is the frequency at which the system will ring, when excited by a sharp blow from a small hammer. It is the compiling of all the variables of stiffness, mass and preloading that finally determine this frequency, to which a particular coupling is tuned. The implications of resonant frequency to a kinematic coupling are several. For a given level of energy, the mechanical excursion of the ringing of a kinematic platform, will be inversely proportional to this frequency, so the higher the resonant frequency of a coupling, the smaller will be the amplitude of its excursion when excited into vibration. There will be less intercourse between a kinematic platform vibrating at a very high frequency and surrounding equipment.
There is less opportunity for sympathetic excitation, of a kinematic system, which has a high resonate frequency, than for a system with an ordinary resonate frequency. A high resonate frequency, will keep outside vibration from affecting the kinematic system. A well designed kinematic system built with ordinary component parts will have a resonate frequency below 800 Hertz. A special high stiffness kinematic system using exotic materials can get up to 1800 Hertz. Hybrid kinematic systems using hard stainless steel and tungsten carbide with large radii of curvature and heavy preload have reached 3000 Hertz resonate frequency. Systems built with extremely stiff cermets, with large radii of curvature and a very heavy preload, have reached a resonate frequency of 6000 Hertz. 6000 hertz is the highest documented resonate frequency as of 2009. Using new materials technology, this is surely not the ultimate limit. We have recently participated in programs using silicon nitride ceramic micro grain, hot isostatic presses tungsten carbide and titanium carbide all of which provide promising properties.
The Rose Bud
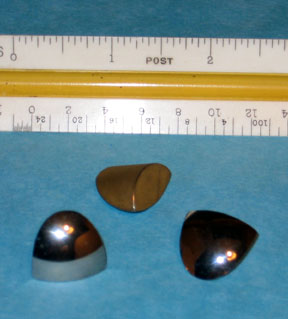
The Rose Bud consists of three cylindrical segments cut from a large radius sphere. These three elemental parts are combined to form a trihedral like clamp, of unsurpassed quality, with a high load carrying capacity. The standard, off the shelf design, of a Rose Petal, that is commercially available, consists of a three quarter inch diameter cylindrical sections, cut out of a one and one quarter inch diameter sphere.
The Rose Petals are made of either hardened stainless steel or tungsten carbide. This finger shaped piece of material is cut through on the radius (center line) of the sphere to form the individual petals of the complete Rose Bud. The complete three petal, Rose Bud is formed by epoxy gluing the three rose petals into three intersecting three quarter inch diameter counter bores. After assembly, wipe the excess epoxy glue away, with some absorbent material wet with Isopropyl Alcohol. The individual rose petals can be threaded to form a more secure mounting. The top of the individual petals can be truncated to reduce the overall height of the Rosebud. (See “Hard Stainless Steel”) (See “Tungsten Carbide”).
Rotary Degrees of Freedom
There are three potential rotary degrees of freedom, for any mechanical body. Each one of the rotary degrees of freedom, occurs around one of the linear axii. Rotation around the “X” axis (which is the left to right or sided to side) is “Roll”. Rotation around the “Y” axis (which is the in and out or front to back) is “Pitch”. Rotation around the “Z” axis (up and down) is “Yaw”.
Short Stroke Wear
Short stroke wear is characteristic of the early stages of Fretting. The two surfaces of the kinematic couple slide over each other, for a short distance, as they seek mechanical equilibrium. Even though the total load on the mobile platform may be quite small, the Hertzian stresses are considerable, due to the minute area of contact between the elements of the coupling. In this situation we have one piece of raw dry material rubbing against the second piece of raw dry material, under considerable stress. Under these conditions the intermolecular temperature on the surface rises and chemical reactions take place, on the atomic level.
When repeated insertions and extractions take place, the residue of these minute chemical reactions (largely oxides) buildup as a layer of brittle material. As this process goes on the compressive stresses on this layer of brittle material causes it to exude out of the joint area and to break up into brick like platelets. When these micron thick platelets re-enter the joint between the elements of the kinematic coupling, gross errors in repeatability begin to occur. The chocking effect of these small bricklets, cause the kinematic platform to stop moving, way before, true mechanical equilibrium is reached. (See “chocking”) (See “Fretting”).
A Six Male Cone and Three Cylinder Kinematic Coupling
Two male cones mated with a male cylinder are an unusual but powerful ploy as a kinematic couple. One couple of this deign is often used separately to securely constrain two degrees of freedom. This approach has a higher load carrying capacity than a cylinder and two spheres, or two cylinders and a sphere. This approach has a higher resonate frequency than two spheres and a cylinder, or two cylinders and a sphere. This arrangement has the broadest capture envelope of any kinematic coupling, except the Keystone design. Anyone familiar with a hertz coupling, will appreciate its similarity with this coupling design. The steeper the included angle of the cones the more accurately it will repeat, but the steeper the angle the lower the load carrying capacity will be. Precision ground cones, with sixty degree and with ninety degree included angles are commercially available. These commercially available male cones are made from hard stainless steel. (See “Hard Stainless Steel”).
Skewed Cylinder Kinematic Coupling
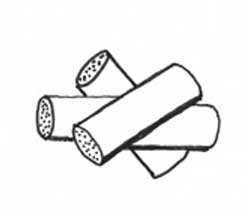
A standard nine cylinder kinematic coupling consists of three sets of three cylinders. Two of these cylinders in each set are fixed at an angle that is usually 90°. This bi-angle set of cylinders is rigidly attached to one of the kinematic platforms of the coupling. When this bi-angle assemblage is brought into right angle contact with a third cylinder that is rigidly fixed to the second platform of the kinematic coupling, a device that will very accurately constrain two degrees of freedom is formed.
Three sets of these two degrees of freedom constraining devices when placed at 120° to each other form an extremely accurate kinematic coupling with a relatively high load carrying capacity. When situations occur where much higher load carrying capacity is required and some limitation, physical, chemical or magnetic, prevents the use of much larger component parts for the kinematic mount; the bi-angle cylinders can be skewed, at an angle that is not perpendicular to the other cylinder.
It is easier to conceptualize this arrangement if you imagine that all three cylinders were placed parallel to each other. With this arrangement, you would have two lines of contact that extended the entire length of all three cylinders. The problem with this arrangement is that this coupling would require perfect alignment of all nine cylinders, and even then it would be grossly over-constrained. What we can do to achieve very high load carrying capacity and reasonably good repeatability is to simply skew the two parallel cylinders at a relatively slight angle to the third fixed cylinder. This arrangement is amazingly self centering and has an extremely high load carrying capacity. Start with a minimum skew angle that is 15° off the horizontal and increase it until satisfactory repeatability is achieved. Basically, the steeper the angle the better it will repeat; but the lower the load carrying capacity will be. Conversely, the flatter the angle between the cylinders the higher the load carrying capacity; but the poorer the repeatability will be.
A Sphere
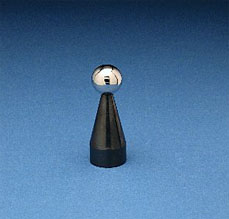
A sphere is one of the fundamental elements in almost all kinematic couplings. A perfect sphere is defined as a geometric figure with its entire surface area equidistant from a single point in three dimensional space. A complete Sphere is a ball that can be economically installed in a kinematic platform by first machining a pocket that is nearly hemispherical. A conical cup can also be used, but it is much less effective. This pocket is wetted with a high strength epoxy glue and the ball is clamped in place with enough force to squeeze out the excess glue.
Wipe the excess epoxy glue away with some absorbent material wetted with Isopropyl Alcohol. The geometric and surface quality of the spheres used in a kinematic coupling, is one of the limiting factors in its performance. The sphere should be very stiff with excellent geometry and a fine surface texture. Complete spheres i.e. balls are commercially available in very high quality, made of materials suitable for kinematic coupling applications. (See “Ball” for a technical description) (See: “Sphericity of a Ball”).
Sphericity of a Ball
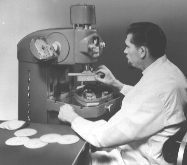
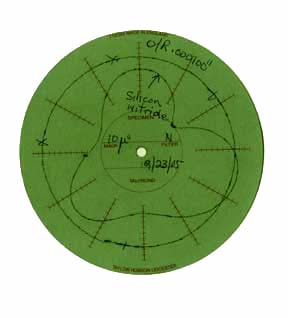
The sphericity is a measure of the accuracy of, the form of a complete ball or sphere or of a segment of a ball i.e. a partial sphere. A common example of a partial sphere would be a magnifying glass or camera lenses. The sphericity of small areas of a spherical surface can be accurately measured optically, with an interferometer. Sphericity can be measured electro mechanically by comparing the well aligned surface of the test sphere or ball, with an accurate axis of rotation and then using reversal technology to separate errors in the axis of rotation, from errors in the sphere. The sphericity of a complete ball can be measured very accurately by simply evaluating three of these roundness measurements made on orthogonal axii.
The very ultimate in spherical measurement is practiced by Stanford University where they measure seventeen longitudes and one equator to very thoroughly evaluate the sphericity of a ball. (Thanks to Dan Dubrey, Stanford University) For their research into ultra precise ball manufacturing, Bal-tec has developed a device that uses the actual surface of the test sphere itself as the reference datum, to measure sphericity on the order of one nanometer. (See: Paper In Precision Engineering, Volume 22, No.1, January 1998)
Split Vee Block
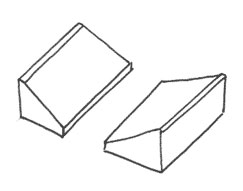
In situations where the mechanical instability of the three contacts, associated with a conventional kinematic coupling can not be tolerated, a split vee block construction can be used. The mechanical instability occurs in three point couplings when off axis loads are applied to a three legged kinematic coupling. A split vee block will effectively turn the unstable three legged coupling, into a very stable, four points of contact.
In situations where a guide rail or other mechanical structures running down through the center of the coupling would interfere with the third couple of a conventional three contact kinematic coupling, a split Vee Block can be used effectively.
Just like the four legs of a table, the split Vee Block design is not very forgiving; therefore close dimensional tolerances must be held or two of the spherical contacts must be made adjustable to compensate for machining inaccuracies.
Split Kinematic Vee Blocks
Split kinematic vee blocks are commercially available in hard stainless steel. (See paper: Split Kinematic Coupling without Abbé Offset on our web site: www.precisionballs.com) (See “Hard Stainless Steel”) (See “Split Kinematics” on the M.I.T. Web site).
Spring Preload
There is a certain minimum mechanical preload, called the “nesting force”, that is required to provide mechanical stability to a kinematic coupling. Spring preloading kinematic couplings presents a number of serious problems. Aligning the line of force applied by a coil spring, with the central axis of a kinematic coupling is an impossible task. The one excellent method of applying a spring force, to a kinematic coupling, is to use a four leaf, flexural spring. This device basically solves all of the number of problems involved in applying a spring preload to a kinematic coupling. This very simple device is a double compound flexural assembly. When the flexing of one of the four leafs tends to move the force off axis in one direction, the matching flexure of the leaf 180 degrees away moves the force in the opposite direction, exactly the same amount, thus correcting the problem. Using Belleville Washers to provide a spring preload is an approach to consider. The main limitation to this approach is that the force of the Belleville Washer is pushing things apart instead of pulling them together. A bulky design must be used to reverse the direction of this spring force. The four leaf flexural springs are commercially available.
The Stiffness
The overall stiffness of a kinematic system consists of three primary constituents. The first is the Young’s Modulus of elasticity of the elemental contact parts, of the flexural coupling itself. The higher the Young’s Modulus of elasticity of these parts, the stiffer the coupling will be. The next factor is the geometry of the elements of the coupling. The biggest factor here is the radii of curvature of the kinematic elements. The larger the radius of the curvature of these individual elements the stiffer will be the assembly. The last is the physical properties of the platforms, that are holding the assemblage of kinematic hardware. What is the size, the shape, the thickness and the Young’s Modulus of elasticity of these two platforms? (Se “Modulus of Elasticity”).
The Surface Finish
The surface or micro finish of the elemental surfaces of contact, refers to those undulations in the surfaces with a wavelength of less than 0.030 inches (0.8mm). Another less recognized system uses a radial concept, where the individual domains of surface texture are assigned according to the number of undulations per revolution. In this system surface finish extends from 45 undulations per revolution to the upper limitations of the measuring equipment, which I usually 450 undulations per revolution. Contrary to many published statements, that the surface finish is not critical for kinematic elements, actually the surface finish of kinematic elements is of paramount importance. It should be very good, if high quality repeatability is to be achieved.
To provide highly accurate location the surfaces of kinematic elements must be slippery. The surfaces must slide over each other, with very low friction, to accurately position the two platforms to achieve kinematic equilibrium. The contact surfaces of kinematic coupling systems, are subject to such extreme stresses, that short stroke wear and eventually fretting, is an ongoing problem. The actual mechanism of these problems, is chemical reactions that take place between the materials of the elemental parts in contact and the environment or to a diffusion bonding or cold welding and then a separation, cycle between two elements of the kinematic couple. The tendency for these actions to take place is inversely proportional to the quality of the surface finish and waviness. The peaks of the surface finish rubbing against each other are highly reactive due to the molecular interface temperature rise, which is brought on by short movement between these surfaces under these extreme stresses. (See: “Short Stroke Wear”) (See: “Fretting”).
Surface Mounted Flat, A
See A Flat Surface Mounted
Surface Texture
The surface texture of an engineered part is a combination of the surface or micro finish and the waviness. It is all of the conventional surface undulations that are shorter than 0.100 inches (2.54mm). The surface finish has a wavelength that is less than 0.030 inches. (0.76mm). The waviness has a wavelength that is at least 0.03 inches (0.76mm), but less than 0.100 inches (2.54mm). Those undulations that are longer than 0.100 inches (2.54mm) are considered errors in geometry. In some radial systems the geometry of a part stops at 15 undulations per revolution and waviness stops at 45 undulations per revolutions, so those undulations that are more frequent than 45 are surface finish. Undulations that occur less than 15 times per revolution are considered geometry.
Surface Mounted V Block or Vee Block
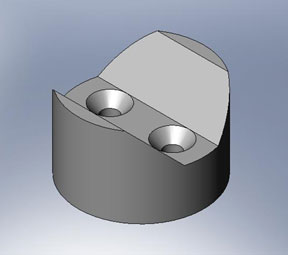
See V Block or Vee Block Surface Mounted.
T.B.R.T.
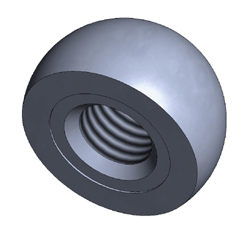
See also Kinematics Components Catalog 105B
Tetrahedron
The Tensile Strength
The tensile strength or ultimate tensile strength is the force required to break a part in two. It is the PSI – (Pounds Per Square Inch) [or the metric equivalent] required to pull a part “apart”.
Threaded Ball
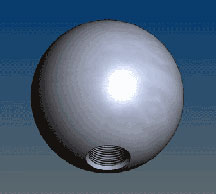
Three Ball Kinematic Couple
The three ball kinematic couple is an extremely powerful device. It is a variation on the Trihedral or Kelvin clamp. It will constrain the three X-Y and Z degrees of linear freedom in an excellent manner. This is a very inexpensive device to construct. The main limitation of the three ball kinematic couple, is its low load carrying capacity. When larger diameter balls are used to improve the load carrying capacity, this couple will become huge. Precision balls are commercially available in both Hard Stainless Steel and Tungsten Carbide for kinematic applications.
A variation on the three ball kinematic couple is the “Rose Bud”. This device gets around the low load carrying limitation and huge size of the three ball couple, by cutting small cylindrical sections out of a large diameter ball and assembling them into a compact device with excellent repeatability and a high load carrying capacity. The “Rose Bud” is commercially available in Hard Stainless Steel and Tungsten Carbide. (See “Rose Bud”). (See “Hard Stainless Steel) (See “Tungsten Carbide”).
A Three Cone and Six Cylinder Kinematic Coupling
Two male cylinders, mated with a male cone, form a powerful, albeit unusual, kinematic couple. An application for this couple is to create a nearly single axis of adjustment for a kinematic couple by rotating a cone mounted eccentric to a cylindrical post. This arrangement has a higher load carrying capacity and a higher resonate frequency than two cylinders and a sphere, or two spheres and a cylinder. Male cylinders are commercially available in hard stainless steel and tungsten carbide. Male cones are commercially available in hard stainless steel, with a 60 degree or a 90 degree included angles. (See “Hard Stainless Steel”) (See “Tungsten Carbide”).
Three Cones and a Sphere
Three male cones arranged as an equilateral triangle form a unique and extremely accurate nest to locate a sphere. This simple arrangement will constrain all three degrees of linear freedom. It fixes the X the Y and the Z axii, but leaves all three of the rotary degrees of freedom perfectly mobile. By itself this couple forms an excellent kinematic pivot. By coupling this device with a Vee Block and two spheres, a very effective kinematic hinge is formed. By joining the three male cones with a Vee Block, a flat and three spheres a complete kinematic coupling is formed, that will constrain all six degrees of freedom in an excellent manner.
The three male cones provide three points of contact with the mating sphere so it is a true kinematic couple. The three cone kinematic couple has a large, long capture envelope. The three cone kinematic couple has a higher load carrying capacity than a three ball kinematic couple. The quality of the geometry and the surface texture, of the conical surfaces, are of prime importance in providing the proper function of these kinematic couples. Male cones are commercially available in 60 degree and 90 degree included angle. These precision ground male cones are manufactured from hard stainless steel. (See hard stainless steel).
A Three Prismatic V Block and Three Sphere Kinematic Coupling
This is the original version of the Maxwell kinematic coupling. (James Clerk Maxwell was the first to describe it 1871). This is the most widely used form of all kinematic couplings. The flat prismatic faces of the vee block give this coupling the best load carrying capacity for a given size ball. (Gothic or Cathedral arches have a higher load carrying capacity, but because of the extreme cost, this design is almost never used). (See: “Gothic Arch”).
Two parallel ground and lapped cylinders can be substituted for each vee block for low load applications. Two of the Quarter Rounds can be substituted for each of the Vee Blocks, to give the highest quality location and good load carrying capacity. Quarter Rounds in a variety of sizes are commercially available in both Hard Stainless Steel and Tungsten Carbide.
Prismatic Vee blocks, in a variety of sizes, for kinematic applications are commercially available in hard stainless steel. This kinematic coupling design will typically give sub-micrometer location and repeatability. This design is very thermically stable, as all three legs of the system expand and contract uniformly with temperature change. (See “Ball”) (See “Vee Block”). (See “Hard Stainless Steel”) (See “Quarter Round) (See “Tungsten Carbide”) (See “Cylinder”).
A Trihedral, a Vee and a Flat With Three Spheres as a Kinematic Coupling
This is the classic Kelvin Clamp (named after Lord Kelvin, the first to describe it 1868-71). The trihedral and a sphere (See “Kelvin Clamp”) will constrain the three linear degrees of freedom X-Y and Z. The Vee Block and a sphere (See this Paper) will constrain the yaw and the pitch. The flat and a sphere will constrain the roll. (See this Paper). This is one of the most powerful kinematic couplings. Repeatability down in the nanometer range can be achieved with very high quality very stiff elements. When this coupling is subjected to temperature changes the area of the trihedral and sphere will retain its position while the other legs expand or contract. All of the component parts to produce this coupling are commercially available. (See “Trihedral”) (See “Vee Block”).
Trihedral Clamp
The Trihedral or Kelvin Clamp, that was first proposed by Lord Kelvin 1868-71. It is an equilateral three facet female prismatic component, used in kinematic couplings. When a ball sits tangent, against the three prismatic facets, of the trihedral prism, it will constrain all three degrees of linear freedom X-Y and Z. In the interest of economics and quality, the trihedral couple is usually constructed of three individual prisms mounted separately to produce tangent contact with the mating ball or spherical segment. The Trihedral clamp can be ground as a monolithical structure by passing a saucer shaped grinding wheel through the openings in the structure at the 120 degree intervals as demonstrated by Douglas Blanding in 1989. Trihedral clamps are usually made of Hard Stainless Steel or Tungsten Carbide. (See “Hard Stainless Steel”) (See “Tungsten Carbide”).
Truncated Ball
See “Ball Truncated”
Truncated Cylinder
See “Cylinder Truncated”
Ultimate Tensile Strength
See The Tensile Strength
Vacuum Compatible Epoxy Glue
This epoxy resin can be used in high vacuum applications. After the initial chemical reaction, there is no further out gassing, of this material. It is good practice, when using epoxy glue, in high vacuum applications, to provide extra vents, that will minimize any chance for the buildup, and retention of gasses generated during catalyzation. (See “Epoxy Glue”).
Vacuum Compatible Kinematic Couplings
Choosing the correct material is important. The two most widely used kinematic coupling materials are type 440C hard stainless steel and Tungsten Carbide ( TC ). Both provide excellent results in any degree of vacuum environment. The component parts can be secured to the kinematic platform with high vacuum compatible epoxy resin, or they can be secured with threaded fasteners. When using threaded fasteners, it is essential that threaded holes be "vented." To make it simple, there must be mechanical communication between the small cavity at the end of the threaded hole and the the vacuum environment. This can be done by drilling the hole for the thread all the way through the part, or by drilling a connecting hole into the cavity from the inside.
The V-Block or Vee Block
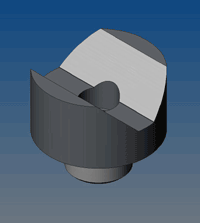
This component part of a kinematic coupling, consists of two flat prismatic surfaces inclined at an angle to each other, to form an internal vee. The functional design of the Vee Block is usually monolithical, but it can also be formed by two separate prisms. (see “Split Vee Block”). The Vee Block is usually used in conjunction with a ball or spherical segment to constrain two degrees of freedom. The steeper the included angle of the prismatic surfaces, of the Vee Block, the more accurate will be the repeatability, but the lower will be the load carrying capacity.
The flatter the angle of the vee block, the higher will be the load carrying capacity, but the poorer will be the repeatability. Up to about 60° included angle, the steeper the included angle of the flat prismatic surfaces, the more accurately this couple will repeat. At angles somewhat steeper than 60°, depending on the stiffness of the construction and the Young’s Modulus of the component parts, the ball will begin to wedge or stick in the vee. About 120° included angle, is the flattest angle that will still give good location. A 90° included angle is the compromise angle that is typically used in most kinematic couplings. Kinematic Vee Blocks in a broad range of sizes are commercially available in hard stainless steel. (See “Hard Stainless Steel”).
V-Block or Vee Block and Ball Kinematic Couple
See “Three prismatic V block or Vee Block and Three Sphere Kinematic Coupling” and ”Hard Stainless Steel”.
A V-Block or Vee Block Surface Mounted
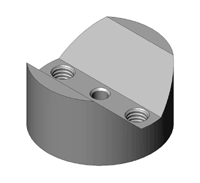
The surface mounted vee block is provided with two threaded holes through the central section to rigidly mount it to the kinematic platform, from the back. Smaller diameter cap screws can be used through these same holes to rigidly mount these Vee Blocks from the front. These component parts have a central recess on the bottom surface, that leaves a flat lapped annulus, which provides excellent location in addition to providing a glue reservoir for a stronger glue line.
These surface mounted Vee Blocks are commercially available in several sizes. They are made of Hard Stainless Steel. The commercially available Vee Blocks have a 90 degree included angle. When heavy loads or vibration prone environments are involved, the cylindrical outside diameter of this Vee Block can be mounted in a close fitting counter bore. For more secure mounting these parts can be epoxy glued to the platform. (See: “Vee Block” for a technical description). (See: “Epoxy Glue”). (See “Hard Stainless Steel”) A V-Block or Vee Block Cylindrical Post Mounted- The cylindrical post mounted Vee Block is the most popular method of mounting a Vee Block.
A precision ground cylindrical post can be press fit into an undersize hole. A threaded concentric hole in the post allows this Vee Block to be securely mounted with a threaded fastener from the back side. A counter bored through hole allows this Vee Block to be securely clamped with a threaded fastener from the front. These cylindrical post mounted Vee Blocks are commercially available in several sizes. They are made of hard stainless steel. The commercially available Vee Blocks have a 90 degree included angle. (See “V-Block”) (See “Hard Stainless Steel”).
Vertical Kinematic Couplings
Many of the kinematic designs that work very well at right angles to the force of gravity end up being flabby or loosy when configured at a steep angle or parallel to gravity. If you were going to hang an antique plate on a wall for display you would use a different method than if you were laying it flat on the shelf of a display case. The most successful design for vertical kinematic structures is to literally hang the one platform on the other. Use a “Kinematic Hinge” perpendicular to gravity and a sphere against a flat for the third couple. (See “Kinematic Hinge”) (See “Trihedral”) (See Vee Block) (See “Three Ball Kinematic Couple”) (See “Ball”) (See “Flat”).
Waviness
Waviness is generally considered to be the up’s and down’s or undulations in the surface of engineered parts that have a wavelength that is at least 0.030 inches (.8 mm) but no more than 0.100 inches (2.54mm) in length. In some systems, that are based for radial evaluation, the various constituents that make up the surface topography of an engineered part, are broken down by the number of undulations per revolution. This system is particularly cogent for the evaluation of small diameter parts. The waviness consists of undulations that occur from 15 times per revolution, to 45 times per revolution. The waviness part of the surface texture spectrum is almost always overlooked in the specifications for kinematic coupling elements. The waviness part of the surface texture spectrum in kinematic elements is the most wear producing condition for kinematic elements.
If the wear produced by the rubbing action between the elemental surfaces of a kinematic coupling, were nice shallow pockets it would’t be too devastating, but this is not what happens. Even under very light loads, the stress between the contact points of a kinematic coupling are very high. The sliding action that occurs under this high stress raises the molecular interface temperature. The chemical reactions that take place between the materials of the coupling at these elevated temperatures and the atmosphere create mostly oxide platelets. The high compressive stresses placed on these platelets exude them out of the area between the kinematic elements and break them up into minute bricklets. When this turbidity lodges between the elements of the kinematic coupling, nothing works right anymore. (See “Short Stroke Wear”) (See “Chocking”)
The Yield Strength
The yield strength of a material is usually specified as the stress per unit area, that causes a 0.2% permanent strain. For this reason the “proportional” limit not the yield strength indicates the onset of true plastic deformation. (See “Permanent Deformation”) (See “Brinelling”) (See “Proportional Limit”)
